
NIC teaming is a built-in feature of Windows Server 2012, and
allows you to provide fault tolerance for your network adapters. NIC
teaming allows multiple network interfaces to work together as a team,
preventing connectivity loss if one network interface card fails. It
allows a server to tolerate network interface card and port failure up
to the first switch segment. NIC teaming also allows you to aggregate
bandwidth from multiple network adapters, for example, so four 1-gigabit
(Gb) network adapters can provide an aggregate of 4 Gb/second of
throughput.
Requirements
NIC Teaming architecture
Requirements
NIC Teaming requires the presence of a single Ethernet
network adapter, which can be used for separating traffic that is using
VLANs. All modes that provide fault protection through failover require
at least two Ethernet network adapters. Windows Server® 2012 supports up
to 32 network adapters in a team.
NIC Teaming architecture
Today, all NIC Teaming solutions on the market have a similar architecture, as shown in Figure 1.
 Teaming solution architecture
Two or more physical network adapters are connected to the NIC Teaming solution multiplexing unit, which then presents one or more virtual adapters (also known as team network adapters) to the operating system. There are several different algorithms that distribute inbound and outbound traffic between the physical network adapters. In current non-Microsoft NIC Teaming solutions, the team network adapters divide traffic by virtual LAN (VLAN) so that applications can connect to different VLANs at the same time. Technically, this separation of traffic is not part of NIC Teaming. However, because other commercial implementations of NIC Teaming have this capability, the Windows Server 2012 implementation also includes it.
2. In the NIC Teaming dialog-box, click on TASKS and click New Team.
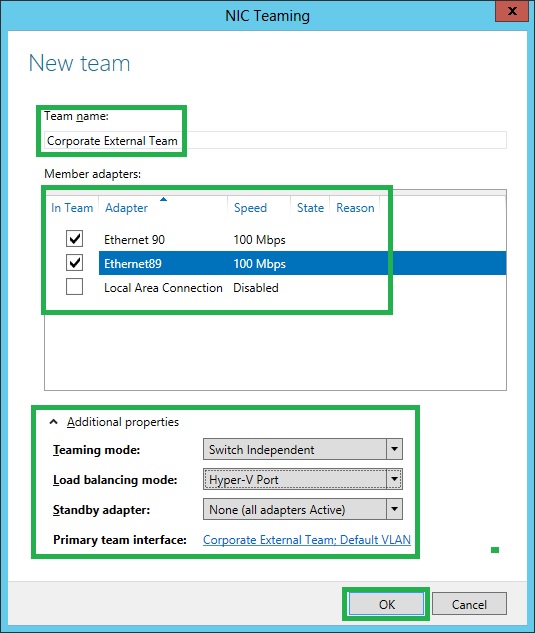
 3. In the New team dialog-box, In Team name: type Corporate External Team as the Team name and under Member adapters select the network adapter to add to the NIC teaming. Under Additional properties, select the Teaming mode: Switch Independent, Load balancing mode: Hyper-V Port, Standby adapter: None (all adapters Active), Primary team interface: Corporate External Team: Default VLAN and then Click OK.
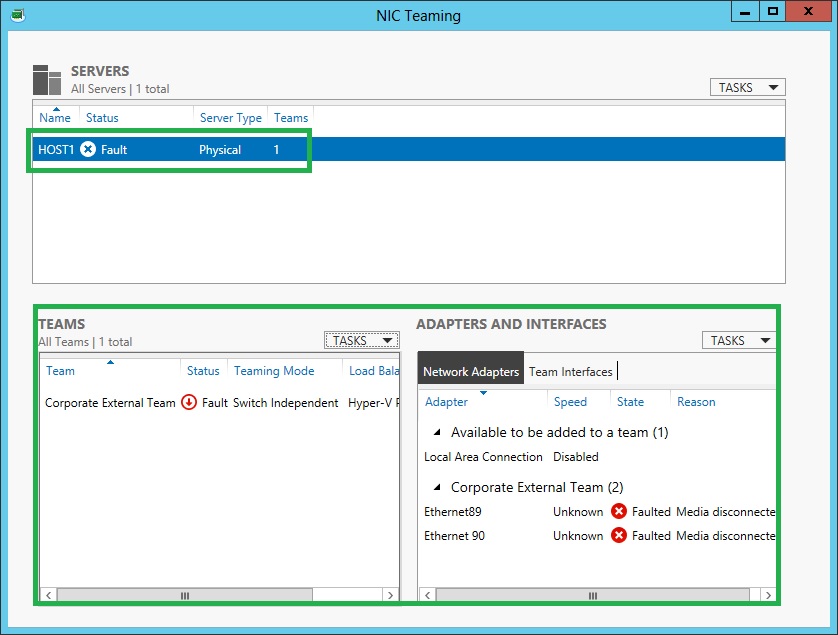
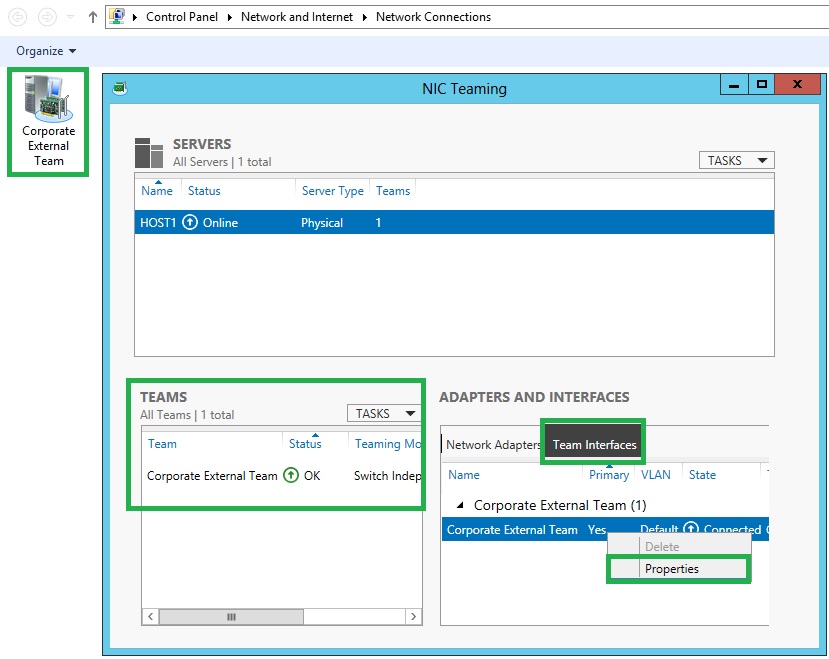
4. For the few seconds, we get Fault Status in NIC Teaming dialog-box and then get Online Status.

5. Under ADAPTERS AND INTERFACES, Click Team Interfaces Tab, Right-Click on Team Interface name, Corporate External Team and Click Properties.
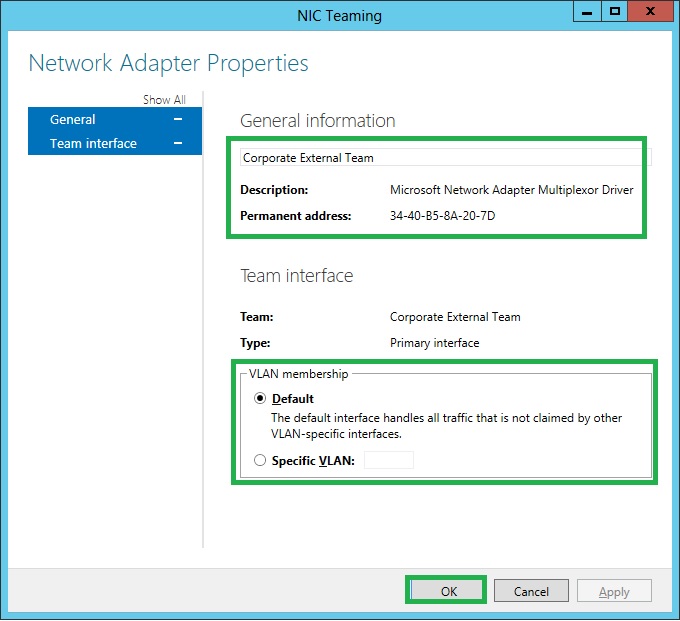
 6. In the Network Adapter Properties dialog box, under General information, noted Description: Microsoft Network Adapter Multiplexor Driver. Verify Default VLAN membership and Click OK.
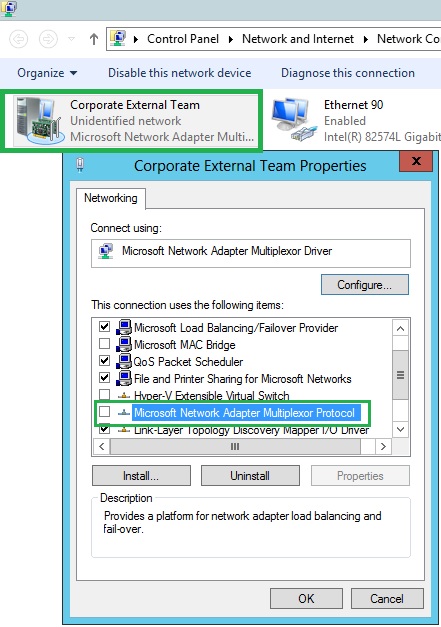
7. In the Network Control Panel, verify Microsoft Network Adapter Multiplexor Protocol under Team Network Properties.
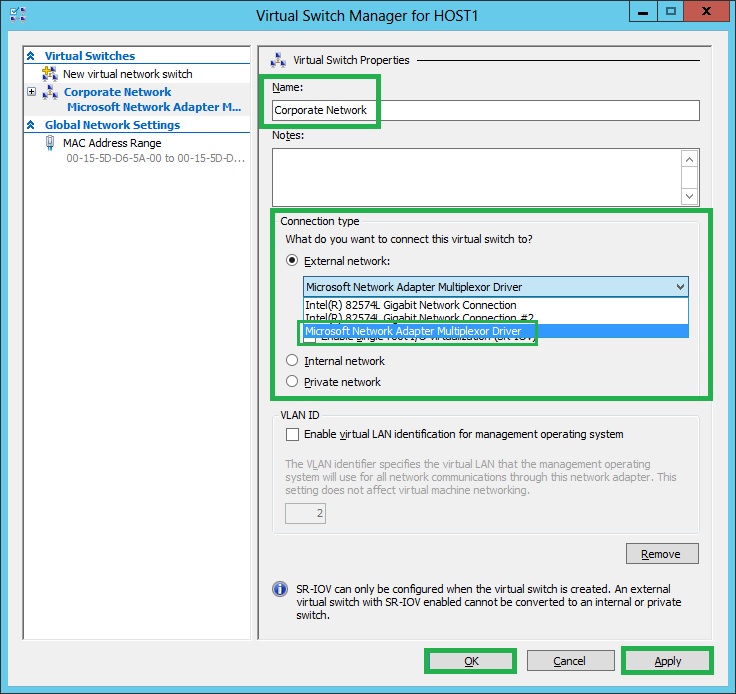
8. In Hyper-V Manager, on the Action pane, click Virtual Switch Manager. In the Virtual Switch Manager dialog box, select New virtual network switch, Ensure that External is selected and Click on Create Virtual Switch. Under External network select Microsoft Network Adapter Multiplexor Driver then Click Apply, review the warning, and then click Yes.
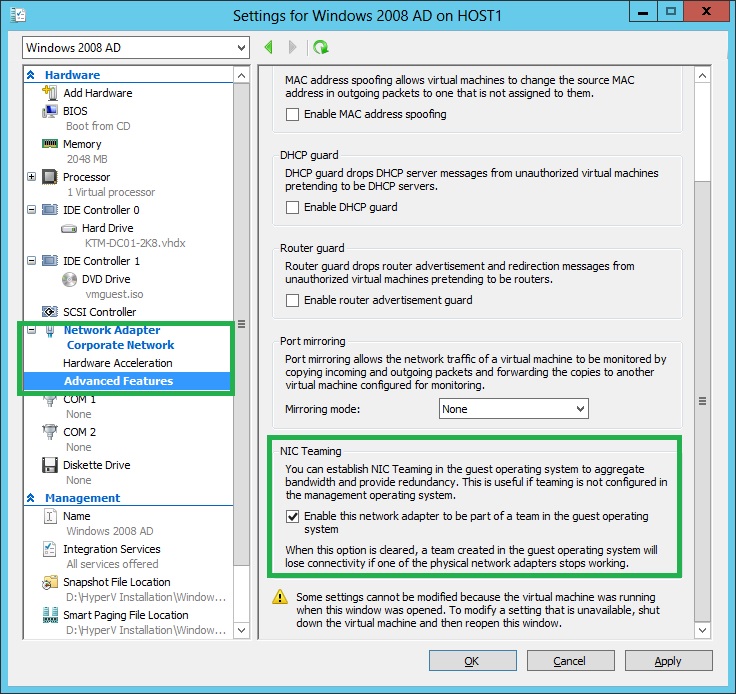
9. Open the Settings of Hyper-V virtual machine, click Network Adapter on the left pane, and select Corporate Network under Virtual switch. Then Click Advanced Features on left pane, then Click on Enable this network adapter to be part of a team in the guest operating system under NIC Teaming, Click Apply and Click OK.

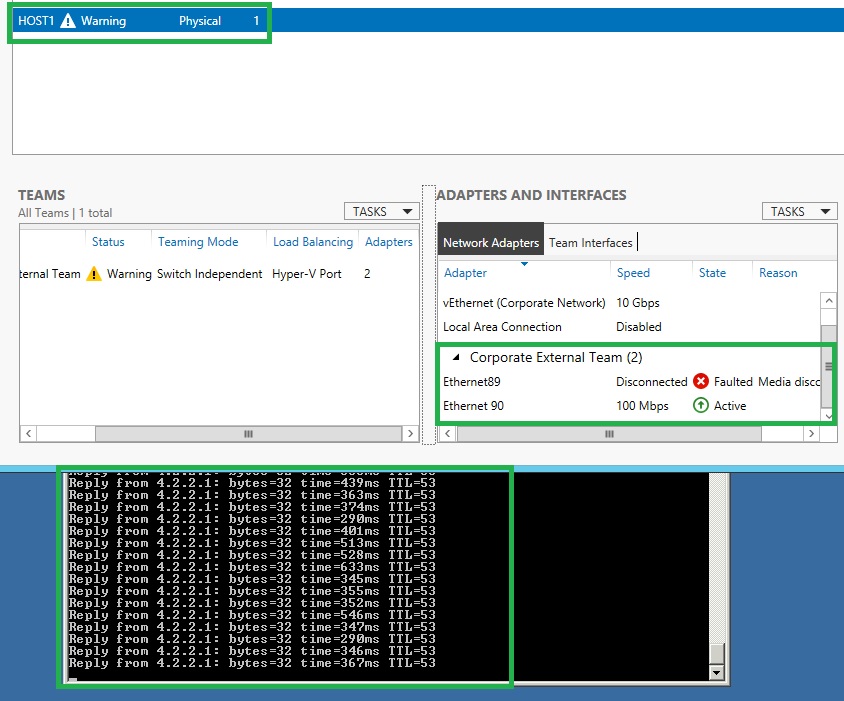
10.To verify NIC Teaming, Unplug Network Cable one of the NIC and PING the Destination Server. We will get Reply from the Destination Server.
Teaming solution architectureTwo or more physical network adapters are connected to the NIC Teaming solution multiplexing unit, which then presents one or more virtual adapters (also known as team network adapters) to the operating system. There are several different algorithms that distribute inbound and outbound traffic between the physical network adapters. In current non-Microsoft NIC Teaming solutions, the team network adapters divide traffic by virtual LAN (VLAN) so that applications can connect to different VLANs at the same time. Technically, this separation of traffic is not part of NIC Teaming. However, because other commercial implementations of NIC Teaming have this capability, the Windows Server 2012 implementation also includes it.
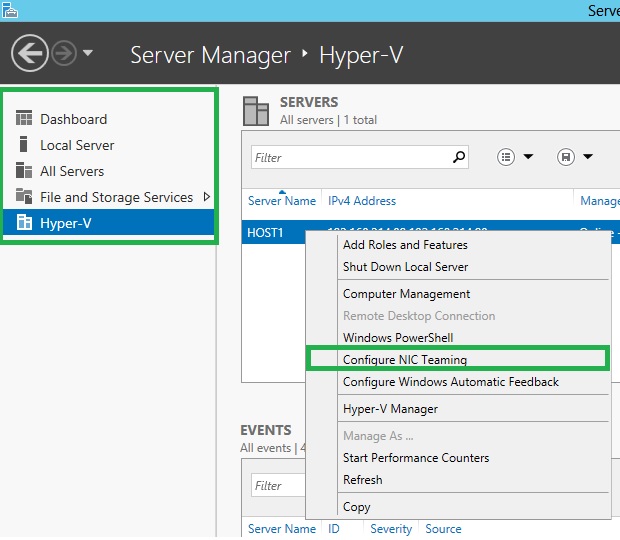
1. Open Server Manager, click on All Servers or Hyper-V on the left-hand side pane, then right-click on the server, HOST1 to enable NIC teaming and select Configure NIC Teaming.
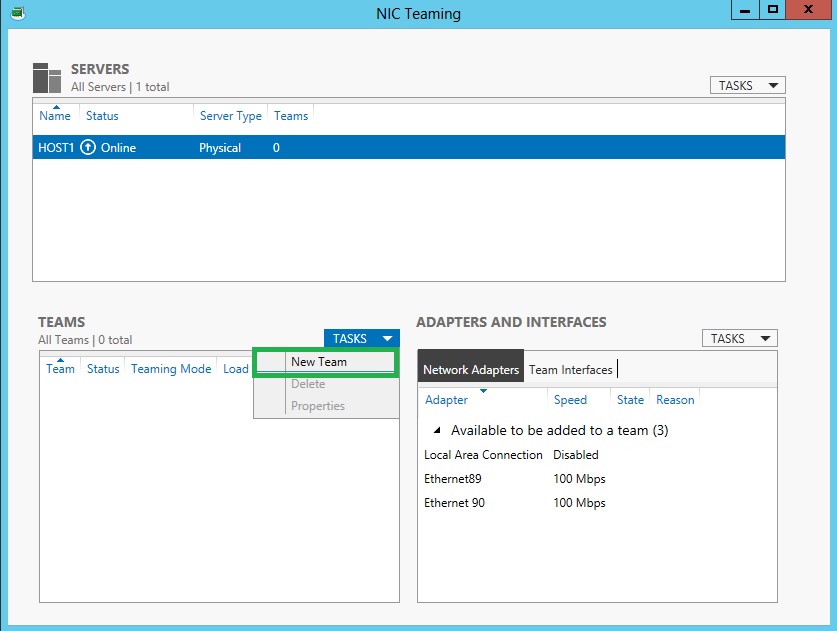
2. In the NIC Teaming dialog-box, click on TASKS and click New Team.
4. For the few seconds, we get Fault Status in NIC Teaming dialog-box and then get Online Status.
5. Under ADAPTERS AND INTERFACES, Click Team Interfaces Tab, Right-Click on Team Interface name, Corporate External Team and Click Properties.
7. In the Network Control Panel, verify Microsoft Network Adapter Multiplexor Protocol under Team Network Properties.
8. In Hyper-V Manager, on the Action pane, click Virtual Switch Manager. In the Virtual Switch Manager dialog box, select New virtual network switch, Ensure that External is selected and Click on Create Virtual Switch. Under External network select Microsoft Network Adapter Multiplexor Driver then Click Apply, review the warning, and then click Yes.
9. Open the Settings of Hyper-V virtual machine, click Network Adapter on the left pane, and select Corporate Network under Virtual switch. Then Click Advanced Features on left pane, then Click on Enable this network adapter to be part of a team in the guest operating system under NIC Teaming, Click Apply and Click OK.
10.To verify NIC Teaming, Unplug Network Cable one of the NIC and PING the Destination Server. We will get Reply from the Destination Server.


0 comments:
Post a Comment